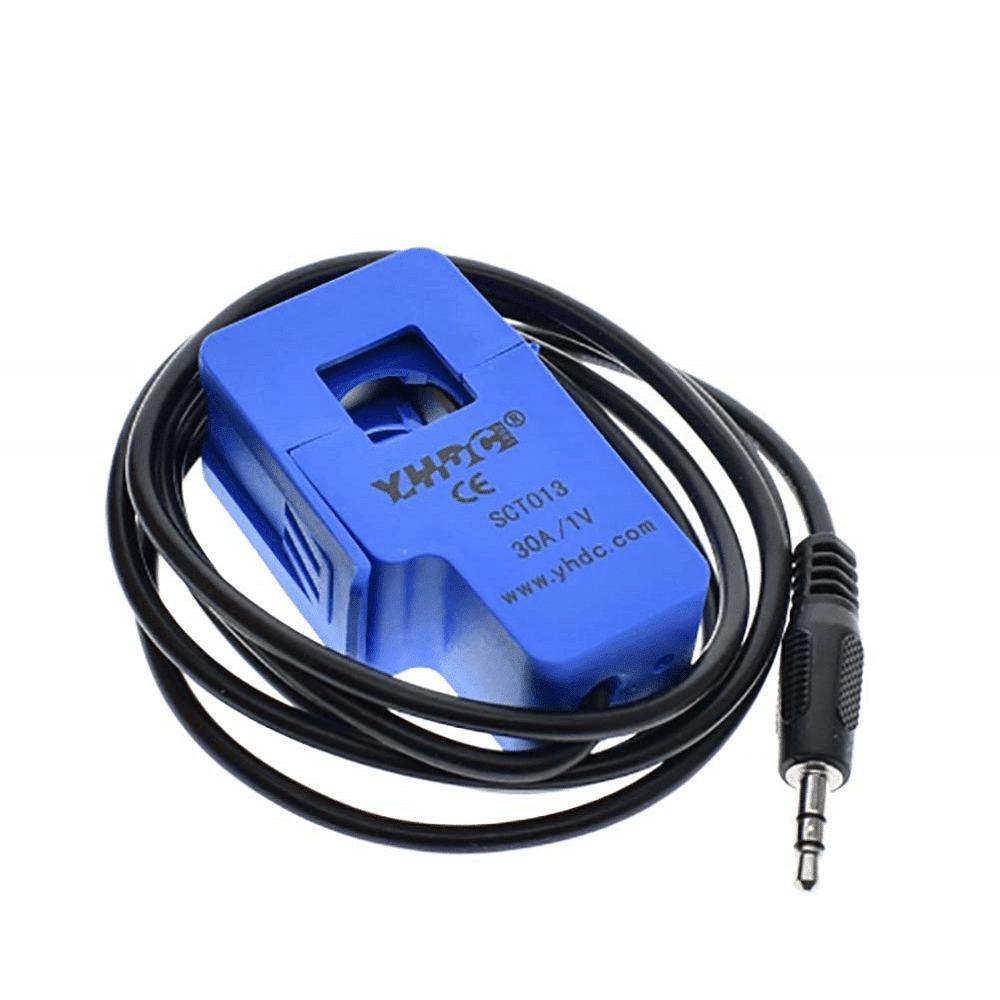
Description
SCT013-030 AC Current Transformer, 30A
Non-invasive current transformer for measuring AC current. Clamp it around one conductor to produce an analog output proportional to the current. The listing specifies 0–30A AC input and 0–1V AC output.
Specifications stated in the listing
- Input: 0–30A AC
- Output: 0–1V AC
- Core: ferrite
- Outer material: plastic
- Aperture: 13 × 13mm
- Output connector: 3.5mm jack
- Integrated burden resistor: 62Ω
- Operating temperature: −25°C to 70°C
- Cable length: 1–1.5m
- Dielectric withstand stated: 6000V AC for 1 minute
Use and applications
The listing suggests home automation, energy monitoring, industrial control, robotics and overload monitoring. The 3.5mm output can be connected using a suitable jack or by preparing the cable as described in the source.
Electrical safety: clamp around one insulated conductor only. Do not clamp around a whole two-wire cable, and do not cut or strip a live conductor. Observe suitable isolation and enclosure practices when working near mains wiring.
Basic Arduino Uno example
#include "EmonLib.h"


EnergyMonitor emon1;


void setup() {
  Serial.begin(9600);
  emon1.current(1, 111.1); // Courant : broche d'entrée, calibration
}


void loop() {
  double Irms = emon1.calcIrms(1480); // Calculer Irms uniquement
  Serial.print("Puissance apparente : ");
  Serial.print(Irms * 230.0); // Afficher la puissance apparente (si 230V)
  Serial.print(" W");
  Serial.print(" | Courant RMS : ");
  Serial.println(Irms); // Afficher le courant RMS
  delay(1000); // Attendre 1 seconde avant la prochaine lecture
}
The source example uses EmonLib, reads RMS current and multiplies by 230V to display an estimated apparent power.
Components listed
- Arduino Uno
- SCT013-030 current sensor
- Connecting wires
Advanced Arduino example with I2C LCD
#include <Wire.h>
#include <LiquidCrystal_I2C.h>
#include "EmonLib.h"


EnergyMonitor emon1;
LiquidCrystal_I2C lcd(0x27, 16, 2); // Adresse I2C 0x27, écran 16x2


void setup() {
  lcd.begin(); // Initialiser l'écran LCD
  lcd.backlight(); // Allumer le rétroéclairage de l'écran LCD
  Serial.begin(9600); // Initialiser la communication série à 9600 bauds


  emon1.current(1, 111.1); // Courant : broche d'entrée, calibration
}


void loop() {
  double Irms = emon1.calcIrms(1480); // Calculer Irms uniquement


  // Afficher la puissance apparente sur l'écran LCD
  lcd.setCursor(0, 0);
  lcd.print("P Apparente: ");
  lcd.print(Irms * 230.0); // Afficher la puissance apparente (si 230V)
  lcd.print(" W");


  // Afficher le courant RMS sur l'écran LCD
  lcd.setCursor(0, 1);
  lcd.print("I RMS: ");
  lcd.print(Irms); // Afficher le courant RMS


  // Afficher les mêmes informations sur le moniteur série
  Serial.print("Puissance apparente : ");
  Serial.print(Irms * 230.0); // Afficher la puissance apparente (si 230V)
  Serial.print(" W");
  Serial.print(" | Courant RMS : ");
  Serial.println(Irms); // Afficher le courant RMS


  delay(1000); // Attendre une seconde avant la prochaine lecture
}
The second source example displays the reading on an I2C LCD and in the serial monitor.
Components listed
- Arduino Uno
- SCT013-030 current sensor
- 1602 I2C LCD
- 10kΩ resistors
- 10µF capacitor
- Breadboard and connecting wires
Library installation
The source instructs installing EmonLib, Wire and LiquidCrystal_I2C from the Arduino IDE Library Manager.
The source code is reproduced unchanged. Its 230V multiplier assumes a nominal supply voltage and estimates apparent power (VA); it does not account for power factor and should not be treated as a real-power measurement in watts. Confirm sensor calibration and the exact circuit before relying on readings. Price: 110 MAD.