Description
AMG8833 8×8 Infrared Thermal Camera Module
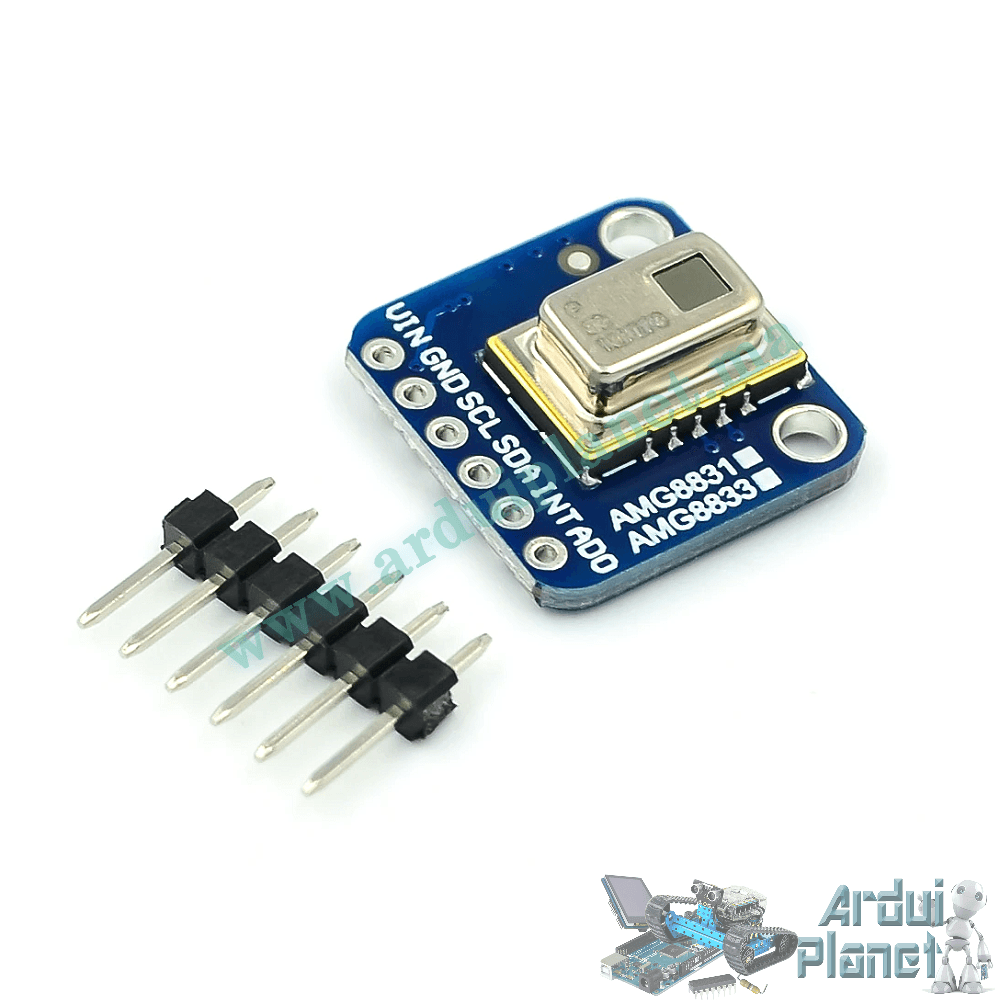
The Panasonic AMG8833 is an 8×8 infrared thermopile array. It returns 64 individual temperature readings over I2C and includes a configurable interrupt output. The source describes use with Arduino or Raspberry Pi and image interpolation for display.
Specifications stated by the source
- Object temperature range: 0–80 °C (32–176 °F).
- Accuracy: ±2.5 °C (±4.5 °F).
- Resolution: 8×8 pixels (64 readings).
- Maximum frame rate: 10 Hz.
- Interface: I2C; configurable INT output; optional AD address pin.
- Source-listed detection distance: up to 7 m. Practical detection depends on target size, temperature contrast, field of view and conditions.
- Module supply is listed as 3.3–5 V. Panasonic specifies the AMG8833 sensor itself for 3.3 V ±0.3 V; confirm that this breakout board includes the regulation/level shifting needed before applying 5 V.
The sensor measures a coarse thermal grid; it is not a conventional visible-light camera or a certified fire/security detector.
Pinout
- VCC: module power (verify board rating).
- GND: ground.
- SCL: I2C clock.
- SDA: I2C data.
- INT: optional interrupt output.
- AD: optional I2C address selection.
Basic Arduino Uno example
The following source code initializes the sensor, reads 64 pixels and prints them to the serial monitor.
#include <Wire.h>
#include <Adafruit_AMG88xx.h>


Adafruit_AMG88xx amg;


void setup() {
  Serial.begin(9600);
  if (!amg.begin()) {
    Serial.println("Échec de la communication avec AMG88xx");
    while (1);
  }
  Serial.println("AMG88xx détecté");
}


void loop() {
  float pixels[64];
  amg.readPixels(pixels);


  for (int i = 0; i < 64; i++) {
    Serial.print(pixels[i]);
    Serial.print(", ");
    if ((i + 1) % 8 == 0) Serial.println();
  }
  Serial.println();
  delay(1000);
}
Basic example wiring
- VCC to the supply supported by the breakout; GND to Arduino GND.
- SCL to A5 and SDA to A4 on Arduino Uno.
Arduino example with OLED display
This source example maps sensor readings to grayscale blocks on an SSD1306 OLED.
#include <Wire.h>
#include <Adafruit_AMG88xx.h>
#include <Adafruit_GFX.h>
#include <Adafruit_SSD1306.h>


Adafruit_AMG88xx amg;
#define SCREEN_WIDTH 128
#define SCREEN_HEIGHT 64
Adafruit_SSD1306 display(SCREEN_WIDTH, SCREEN_HEIGHT, &Wire, -1);


void setup() {
  Serial.begin(9600);
  if (!amg.begin()) {
    Serial.println("Échec de la communication avec AMG88xx");
    while (1);
  }
  display.begin(SSD1306_SWITCHCAPVCC, 0x3C);
  display.display();
  delay(1000);
  display.clearDisplay();
}


void loop() {
  float pixels[64];
  amg.readPixels(pixels);


  display.clearDisplay();
  for (int i = 0; i < 64; i++) {
    int color = map(pixels[i], 20, 40, 0, 255);
    display.fillRect((i % 8) * 8, (i / 8) * 8, 8, 8, color);
  }
  display.display();
  delay(1000);
}
Advanced example wiring
- AMG8833: VCC, GND, SCL to A5 and SDA to A4.
- OLED: VCC, GND, SCL to A5 and SDA to A4.
Libraries
Install these libraries through Arduino IDE Library Manager:
- Adafruit AMG88xx.
- Adafruit GFX Library.
- Adafruit SSD1306.
For both examples, verify the board voltage and I2C pull-up levels before wiring. The code is provided by the source listing; confirm it compiles with the installed library versions and the exact breakout board.